Getting started with Notion Calendar
Get started with Notion calendar to manage your work and life. Learn how to connect your personal and work calendars, Notion databases, and more.
- Manage all your events in Notion Calendar
- 5 steps to set up your Notion Calendar
- A calendar linked to your most important work
- Connect with team members in the office and globally
- Use shortcuts for more efficient navigation
- Linking databases to your Notion calendar
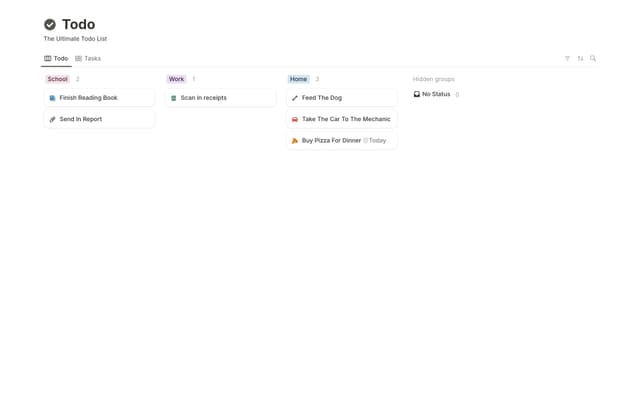
- Personal task tracker
- Product roadmap
- Content calendar
- Manage your calendar's scheduling settings
- Streamline multiple bookings with one share link
- Avoid conflicts across multiple calendars
- Reschedule or cancel meetings through the same link
Most calendar apps are standalone tools, disconnected from the places where you actually do your work and store your knowledge.
Notion Calendar is designed to allow you to manage all your commitments alongside where you do work.
You already have tasks, projects, notes, and knowledge in Notion, and now you can add the layer of time.
Instead of having to manually add focus blocks, tasks, and work items from Notion to your Calendar, all you have to do now is connect a database or link a Notion page to an event.
Notion Calendar syncs with calendars like Google Calendar and Apple iCloud, allowing you to manage your personal and professional schedules in one app—no more juggling multiple calendars.
You’ll have full transparency to track your days and weeks without ever missing an important meeting.
In this guide, you’ll learn how to get started with Notion Calendar and some valuable tips and tricks.

It will only take five simple steps to get started with Notion Calendar.
Download the desktop app — Notion Calendar is separate from the Notion app, so you’ll need to download the Notion Calendar app for Mac or Windows.
Enable event notifications — When you enable notifications, you’ll get helpful reminders for upcoming events, including a countdown timer in your desktop menu bar.
Connect calendar accounts — When you connect all your Google accounts or Apple iCloud accounts, all events from these calendars will appear in your Notion Calendar. You can hide calendars as needed.
Link your Notion workspace — Follow the steps to link Notion Calendar to your workspace.
Add Notion databases — With workspaces connected, you can start to add Notion databases to your calendar. Events will appear in your calendar for items in connected databases which have a time and date.
Currently, you might be managing your commitments in a separate calendar app where you need several calendars. If you already use Notion for task management and knowledge, Notion Calendar is a seamless way to connect your events with contextual information.
Once you have all your calendars and databases connected, you can schedule meetings, add events that are connected to your Notion databases, and link Notion pages to events to make the most of your time.
To get started with Notion Calendar, simply download and install the app and sign in with your Notion account.

Sign in with Apple iCloud
With Notion Calendar you can:
See all professional and personal commitments in one place — Work and personal lives are intertwined, and your calendar should reflect this. View all calendars in your Notion Calendar, without switching tools. To connect a calendar, click
+ Add calendar accountand select all your calendars.Block personal events on your calendar — Enable event blocking by clicking on your personal calendar in the sidebar. This will create “busy” blocks on your work calendar for all personal events.
Connect Notion databases so events appear in your schedule — Normally, you’d need to copy events from a Notion database into a separate calendar app. However, Notion Calendar automatically populates your calendar with dated events in databases you’ve connected.
Link Notion pages to your events — For events pulled into your calendar from a connected database, you can select
Open in Notionto navigate to the Notion page. When you create a new event in Notion calendar, click on Docs and links to link an existing Notion page or create a new one.
Countdown to your upcoming events — When you have an upcoming event, you’ll see a countdown timer in your menu bar to help you stay ahead of your schedule.
Connect with team members in the office and globally
Whether your team members are sitting on the desk opposite yours, or on the other side of the world, Notion Calendar helps you connect and collaborate conveniently.
Create a new event by double-clicking on the time and date in your calendar. Then, you can add Participants who’ll receive an invite, as well as a Zoom or Google Meet Conferencing link, Location, and attach any relevant Docs and links.
Your colleagues can also book time with you. To enable this, click Share availability in the Scheduling snippet. Here, mark available times on your calendar so colleagues can book a meeting with you in one click.
And, if your team is international, you don’t have to waste time going back and forth to arrange meetings that work for everyone. Visualize the schedule in different locations by clicking on the time zone in the top left corner and selecting another time zone.
Use shortcuts for more efficient navigation
Notion Calendar is intuitive to navigate, and you can get around even faster using shortcuts.
Here are some helpful shortcuts to speed up your workflow:
Go to today — Press T to navigate back to today, or click on the Today button at the top of the grid.
Go to next week or month — Hit J to skip forward to the next week or month (depending if you are in weekly or monthly view). Hitting K will take you back to the previous week or month.
Navigate forward or backward — Use the
←and→keys to move left (past) or right (future).Share your availability — Hit
Sto go to the Share availability window and mark free time on your calendar.See your next upcoming event — Skip ahead to the next event in your calendar by tapping
N. You can go to the previous even using B or shift N.Show or hide weekends —
Ctrl/⌘ Kwill alternate between showing or hiding weekends in the calendar.Learn and customize all keyboard shortcuts — Press
?for a list of all available keyboard shortcuts. You can customize shortcuts by going to Settings, Calendar, and selecting Menu bar.
Connecting databases to Notion Calendar lets you turn database entries into events on your calendar.
Once you’ve added a database, all dated items from the database will appear in your calendar. If no start and end time is specified, your items will show up as All-day events at the top of your calendar view. You can drag and drop these events to specific times in the day, and your Notion database will automatically update to mirror your calendar.
Personal task tracker
Connect your personal task database to Notion Calendar so you can track everything you need to do, and manage your to do list.
This is especially helpful if you want to use time-blocking to get more done. Make sure items in your database include a start and end time to block off time on your calendar for each task.
Product roadmap
Keep up with planned launches by connecting your team’s product roadmap to your Notion calendar.
These can be all-day events which will appear at the top of your day’s schedule and don’t block off any time on the calendar.
Switch to monthly view in the top-right dropdown for an overview of the month’s upcoming launches.
Content calendar
Stay on track with publishing deadlines by connecting your team’s content calendar to your Notion Calendar.
You’ll see any pieces that are scheduled to go live, so you can plan you time and create any supporting content required. Plus, you can easily navigate to article and post drafts and notes in Notion which are only a click away.
Whether you're booking multiple coffee chats or making sure your calendar stays conflict-free, Notion's scheduling settings help you manage your time blocks in one simple place.
Streamline multiple bookings with one share link
Notion Calendar makes it easy to create multiple time slots for meetings like office hours through a single share link. The share availability link stays active as long as there are open time slots, allowing multiple people to book meetings through the same link. This means you can share one scheduling link that remains active until all future time slots are filled. Learn how to create a share link by visiting our reference article.
When you select the scheduling link button on the right-hand sidebar, you'll be presented with two options— creating a recurring link or a one-off link. Whether you're planning regular meetings or one-time chats, you can create appointment slots that match your schedule. Check out our reference article to learn how to configure these settings.
Avoid conflicts across multiple calendars
Juggling multiple calendars can be tricky. With separate work and personal calendars, it's challenging to coordinate everything—making sure your last meeting doesn't clash with your evening run, or your doctor's appointment doesn't overlap with an important one-on-one. Having multiple calendars makes it even harder to share your availability for activities like coffee chats or consultation hours. That's where Notion Calendar's conflict avoidance setting comes in handy. When enabled, your share availability link will automatically show time slots that don't conflict with "busy" events on your chosen calendar(s).
Here's what counts as a "busy" event:
A focus time or out of office event
A meeting where you've responded
accepted(yes) ortentative(maybe)An event you created or organized
When you're setting up your share availability, you can turn on conflict avoidance to keep your schedule in check. To enable this feature:
Click the
Schedulingbutton to open the schedule managerAdjust your availability settings and scroll to the bottom
Toggle on
avoid conflictsunder your main calendar and choose which calendars to sync
With this handy setting, your scheduling link automatically updates to show only times that don't clash with your existing meetings—just refresh the link to see what's available.
Reschedule or cancel meetings through the same link
Participants can easily reschedule or cancel their meetings using a link in the event description. This link directs them to a simple booking page where they can select a new time or cancel—making schedule changes quick and effortless.


Set your preferred meeting type
Something we didn’t cover?


