Custom data retention settings

Enterprise workspace owners have control over when users’ pages are deleted from Trash, and how long they can be retained for afterwards 🗑️

Note: This feature is only available to users on the Enterprise Plan.
Users can delete any pages that they have edit or full access to. They can also restore or remove those pages from Trash.
As an Enterprise workspace owner, you can decide how long a page stays in Trash before it’s permanently deleted and no longer accessible to users. To do this:
Go to
Settingsin your sidebar.Select
Security.Open the
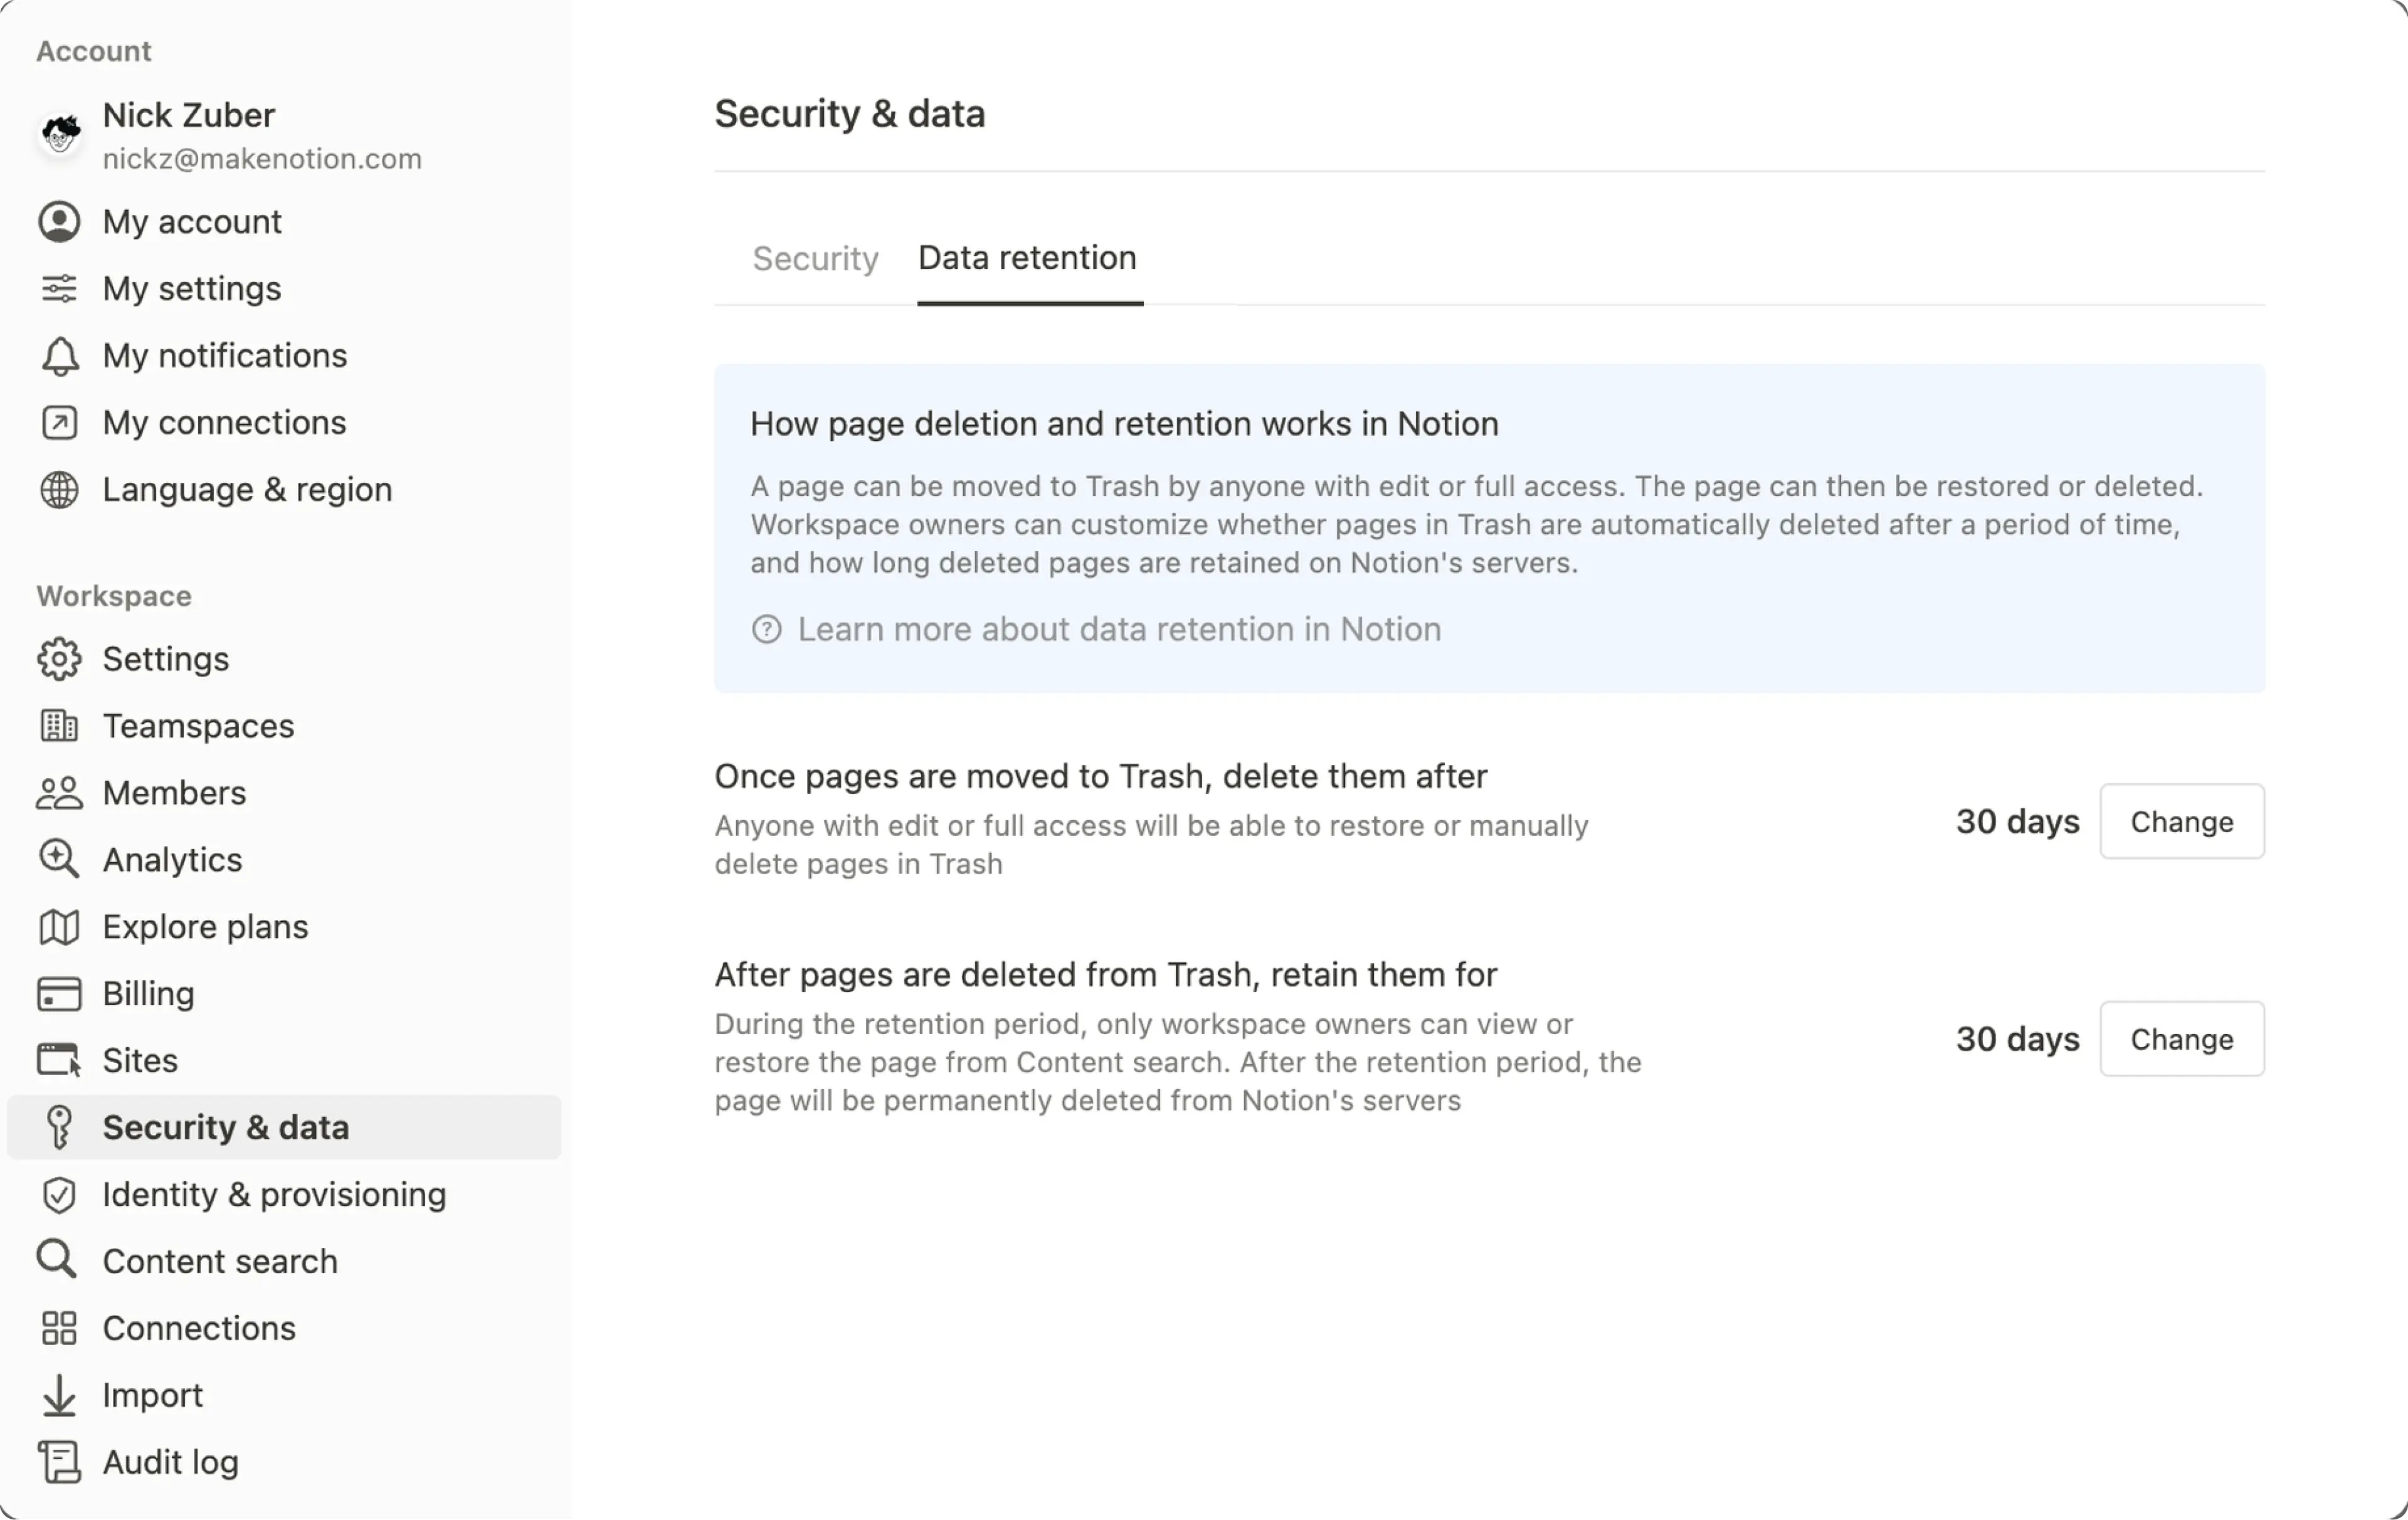
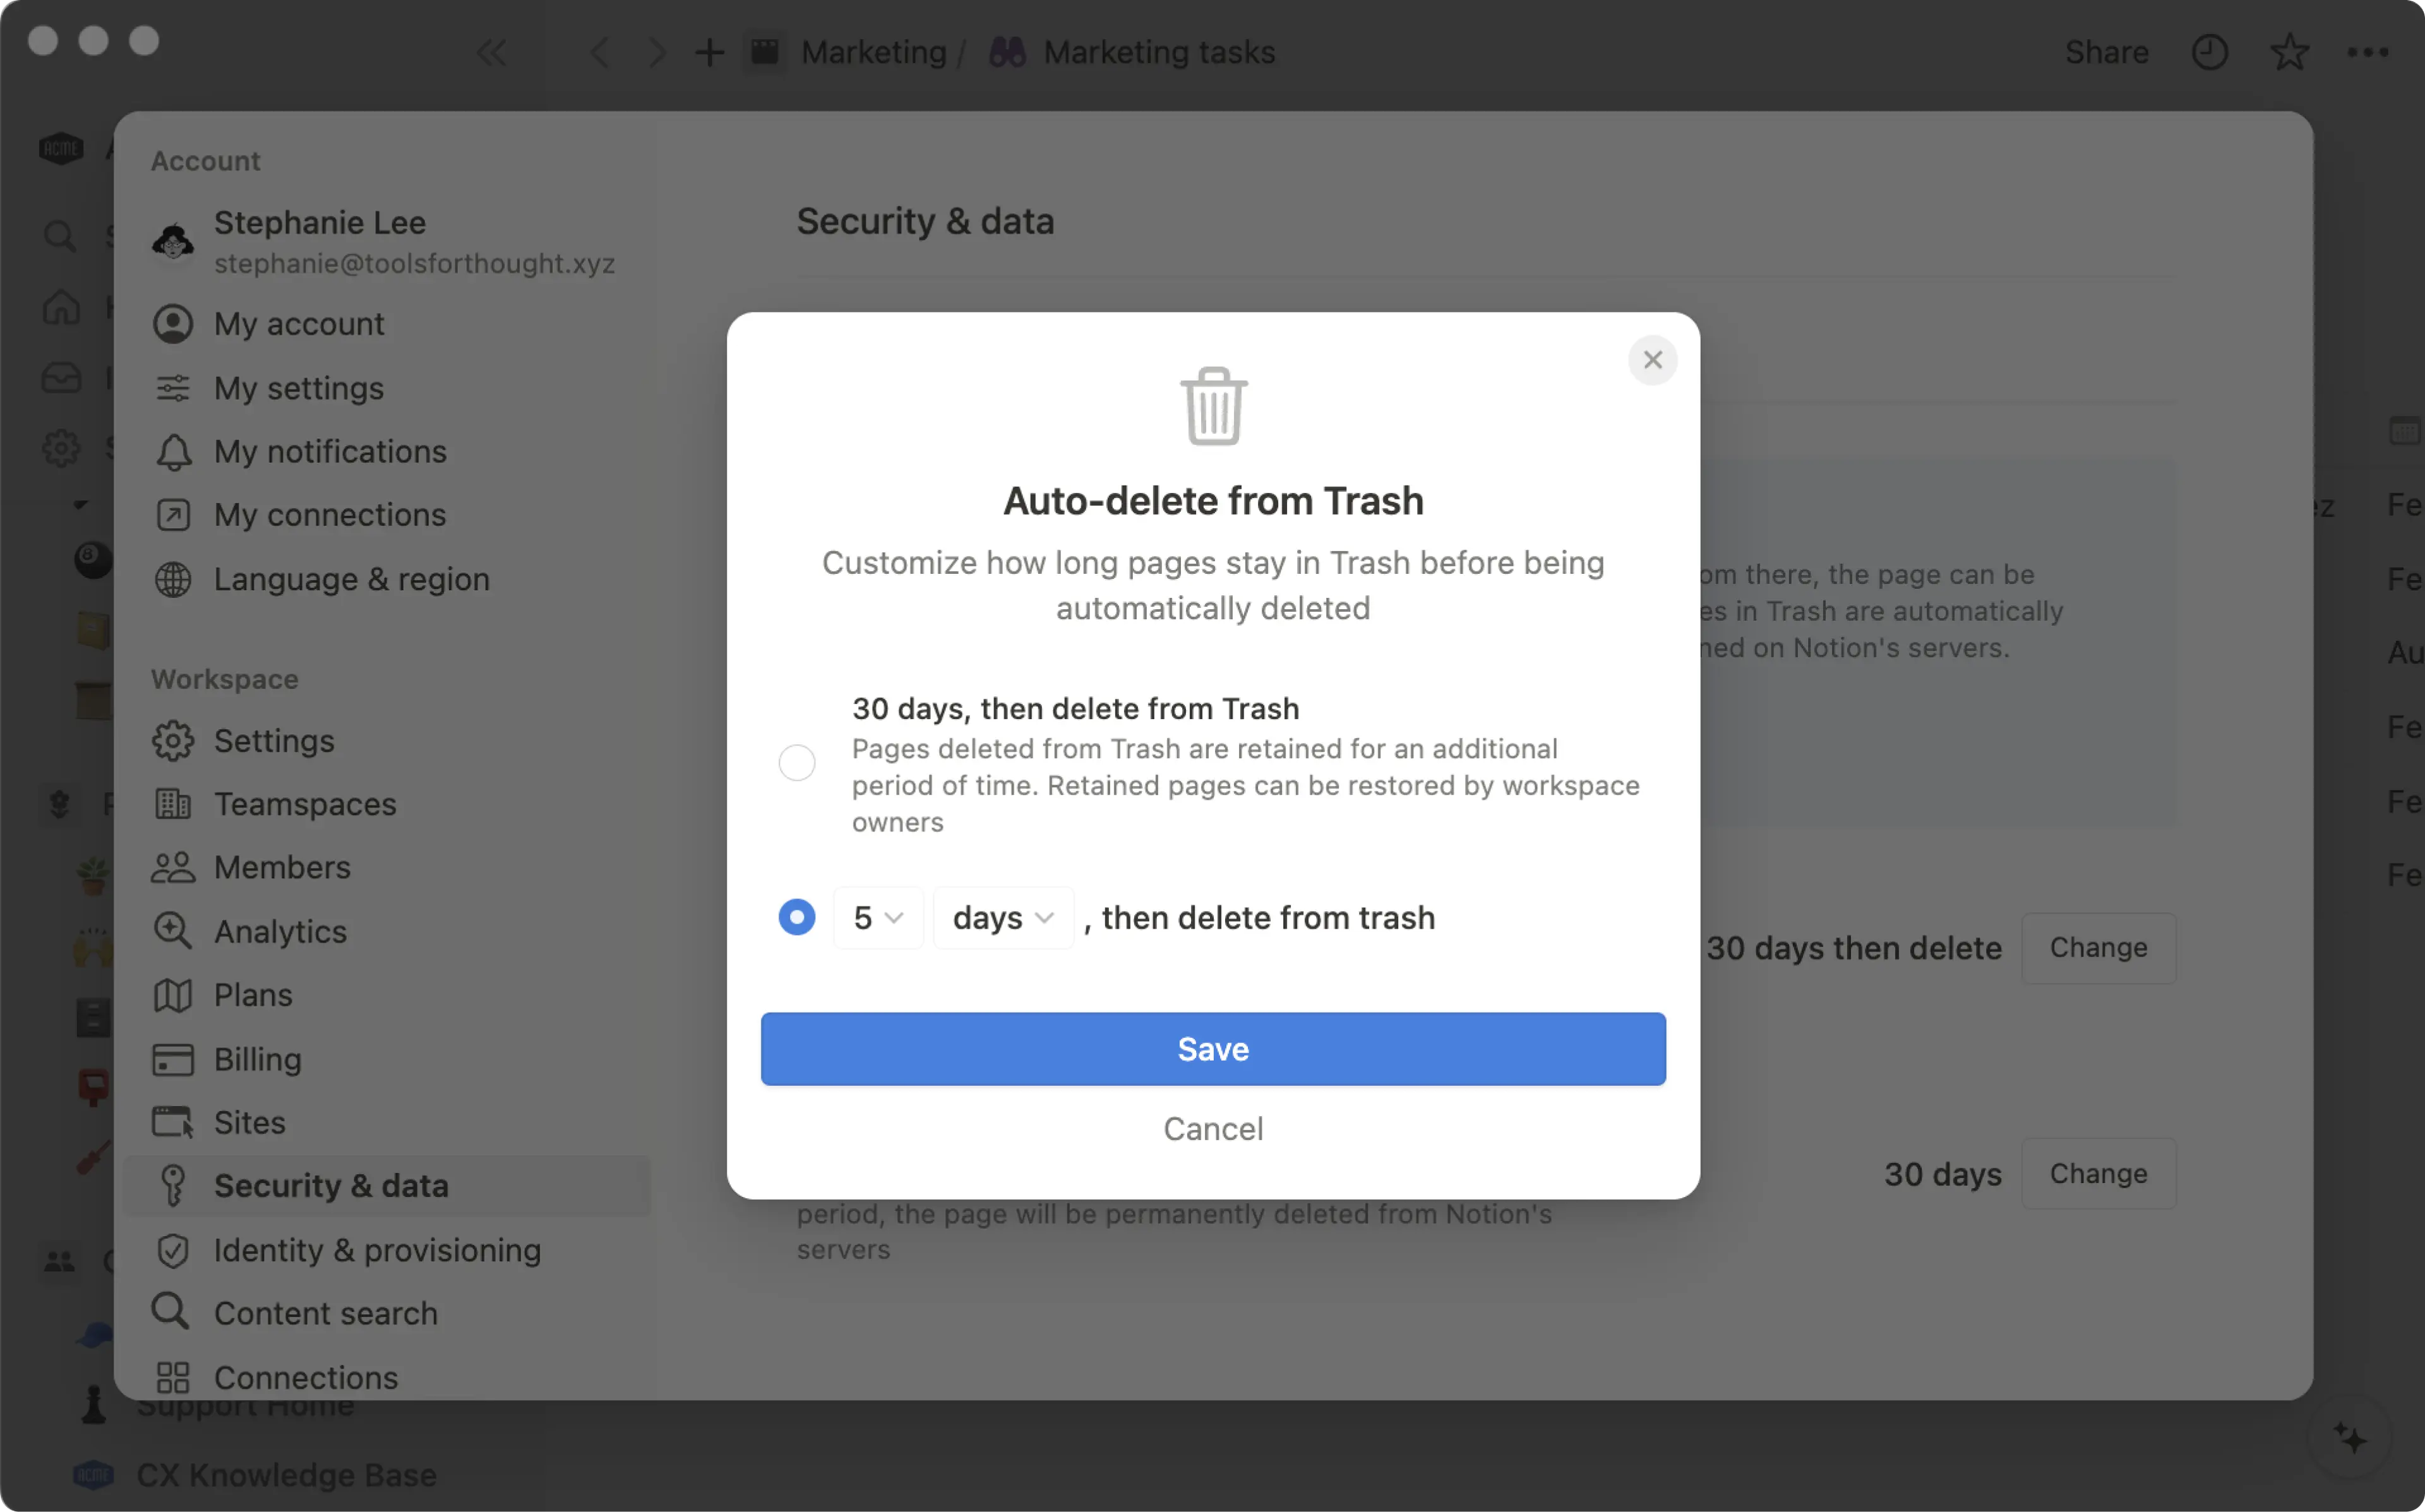
Data retentiontab.You’ll see the current setting for when pages in Trash will be deleted. By default, this is 30 days. Select
Changeto customize it.Set a custom time period between one day and 10 years. Your time period can be set in days or years.
Once you’re done, select
Save.
When users in your workspace navigate to Trash in the sidebar, they’ll be able to see how long pages have before they’re deleted from Trash.

Only Enterprise workspace owners can view and restore pages after they’ve been permanently deleted from Trash. To set the length of this retention period:
Go to
Settingsin your sidebar.Select
Security.Open the
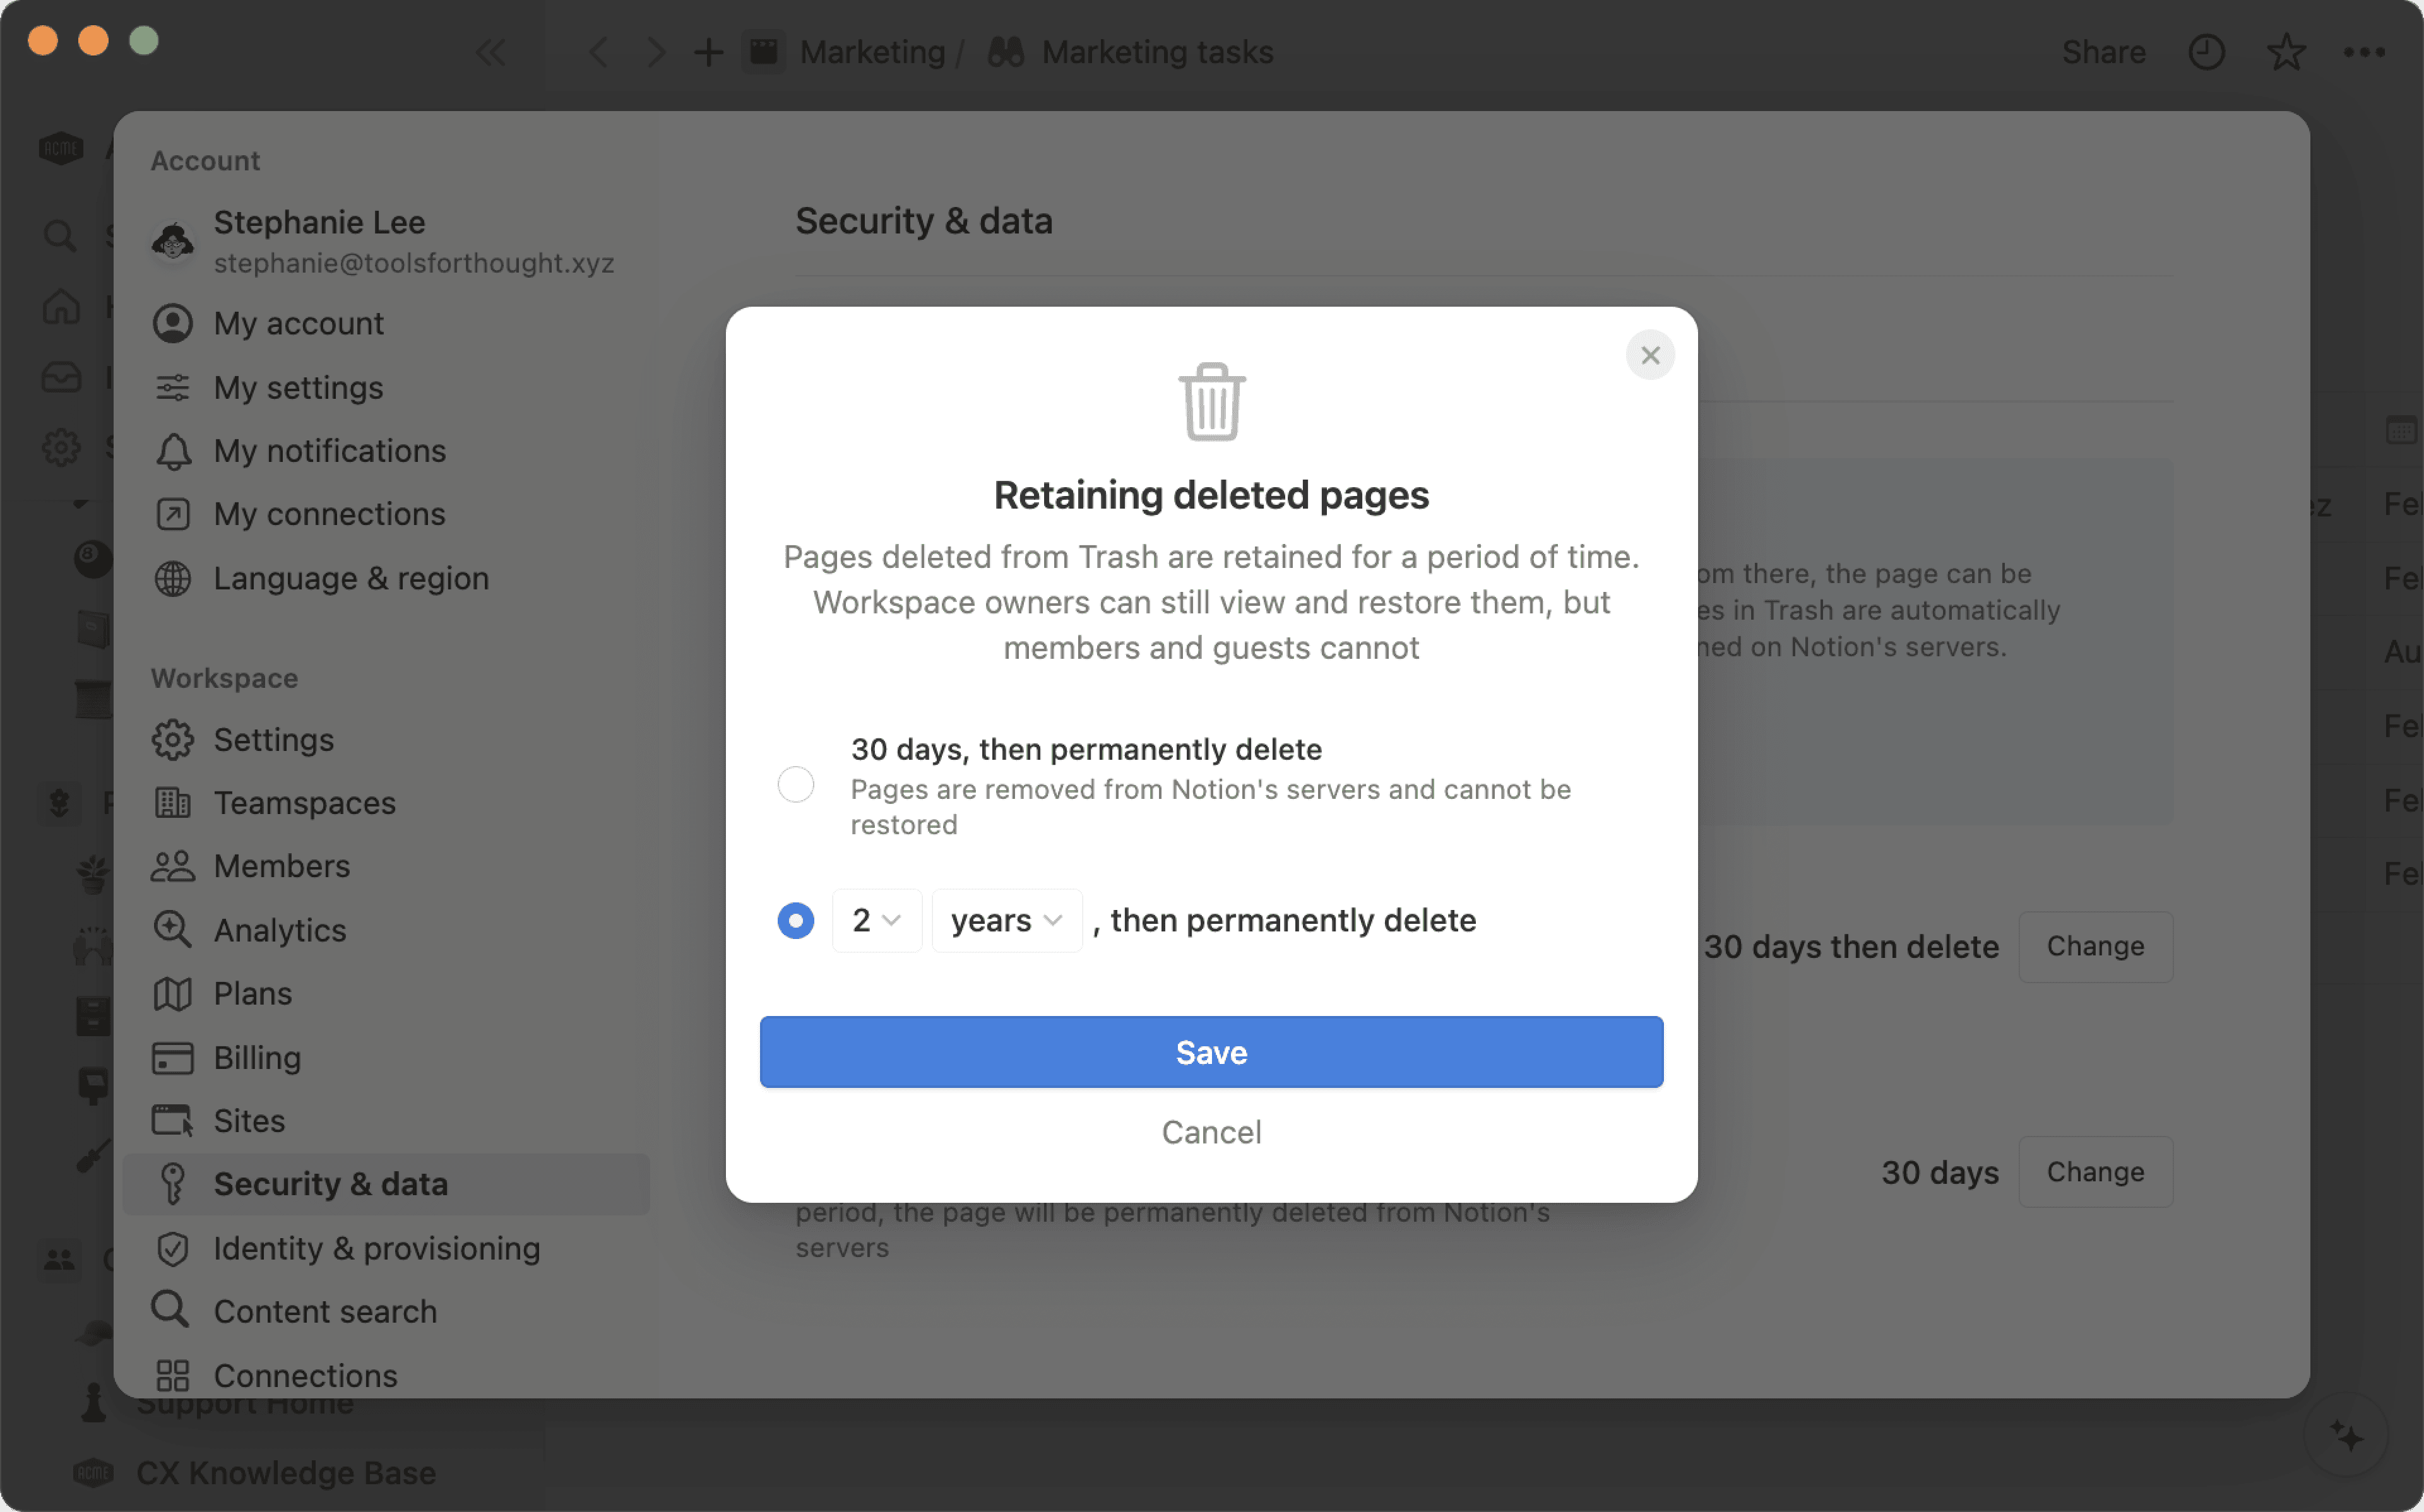
Data retentiontab.You’ll see the current setting for how long pages will be retained. By default, this is 30 days. Select
Changeto customize it.Set a custom time period between one day and 10 years. Your time period can be set in days or years.
Once you’re done, select
Save.

Note: Once a page is permanently deleted by you or automatically following the retention period, workspace owners will also be unable to access or restore it.

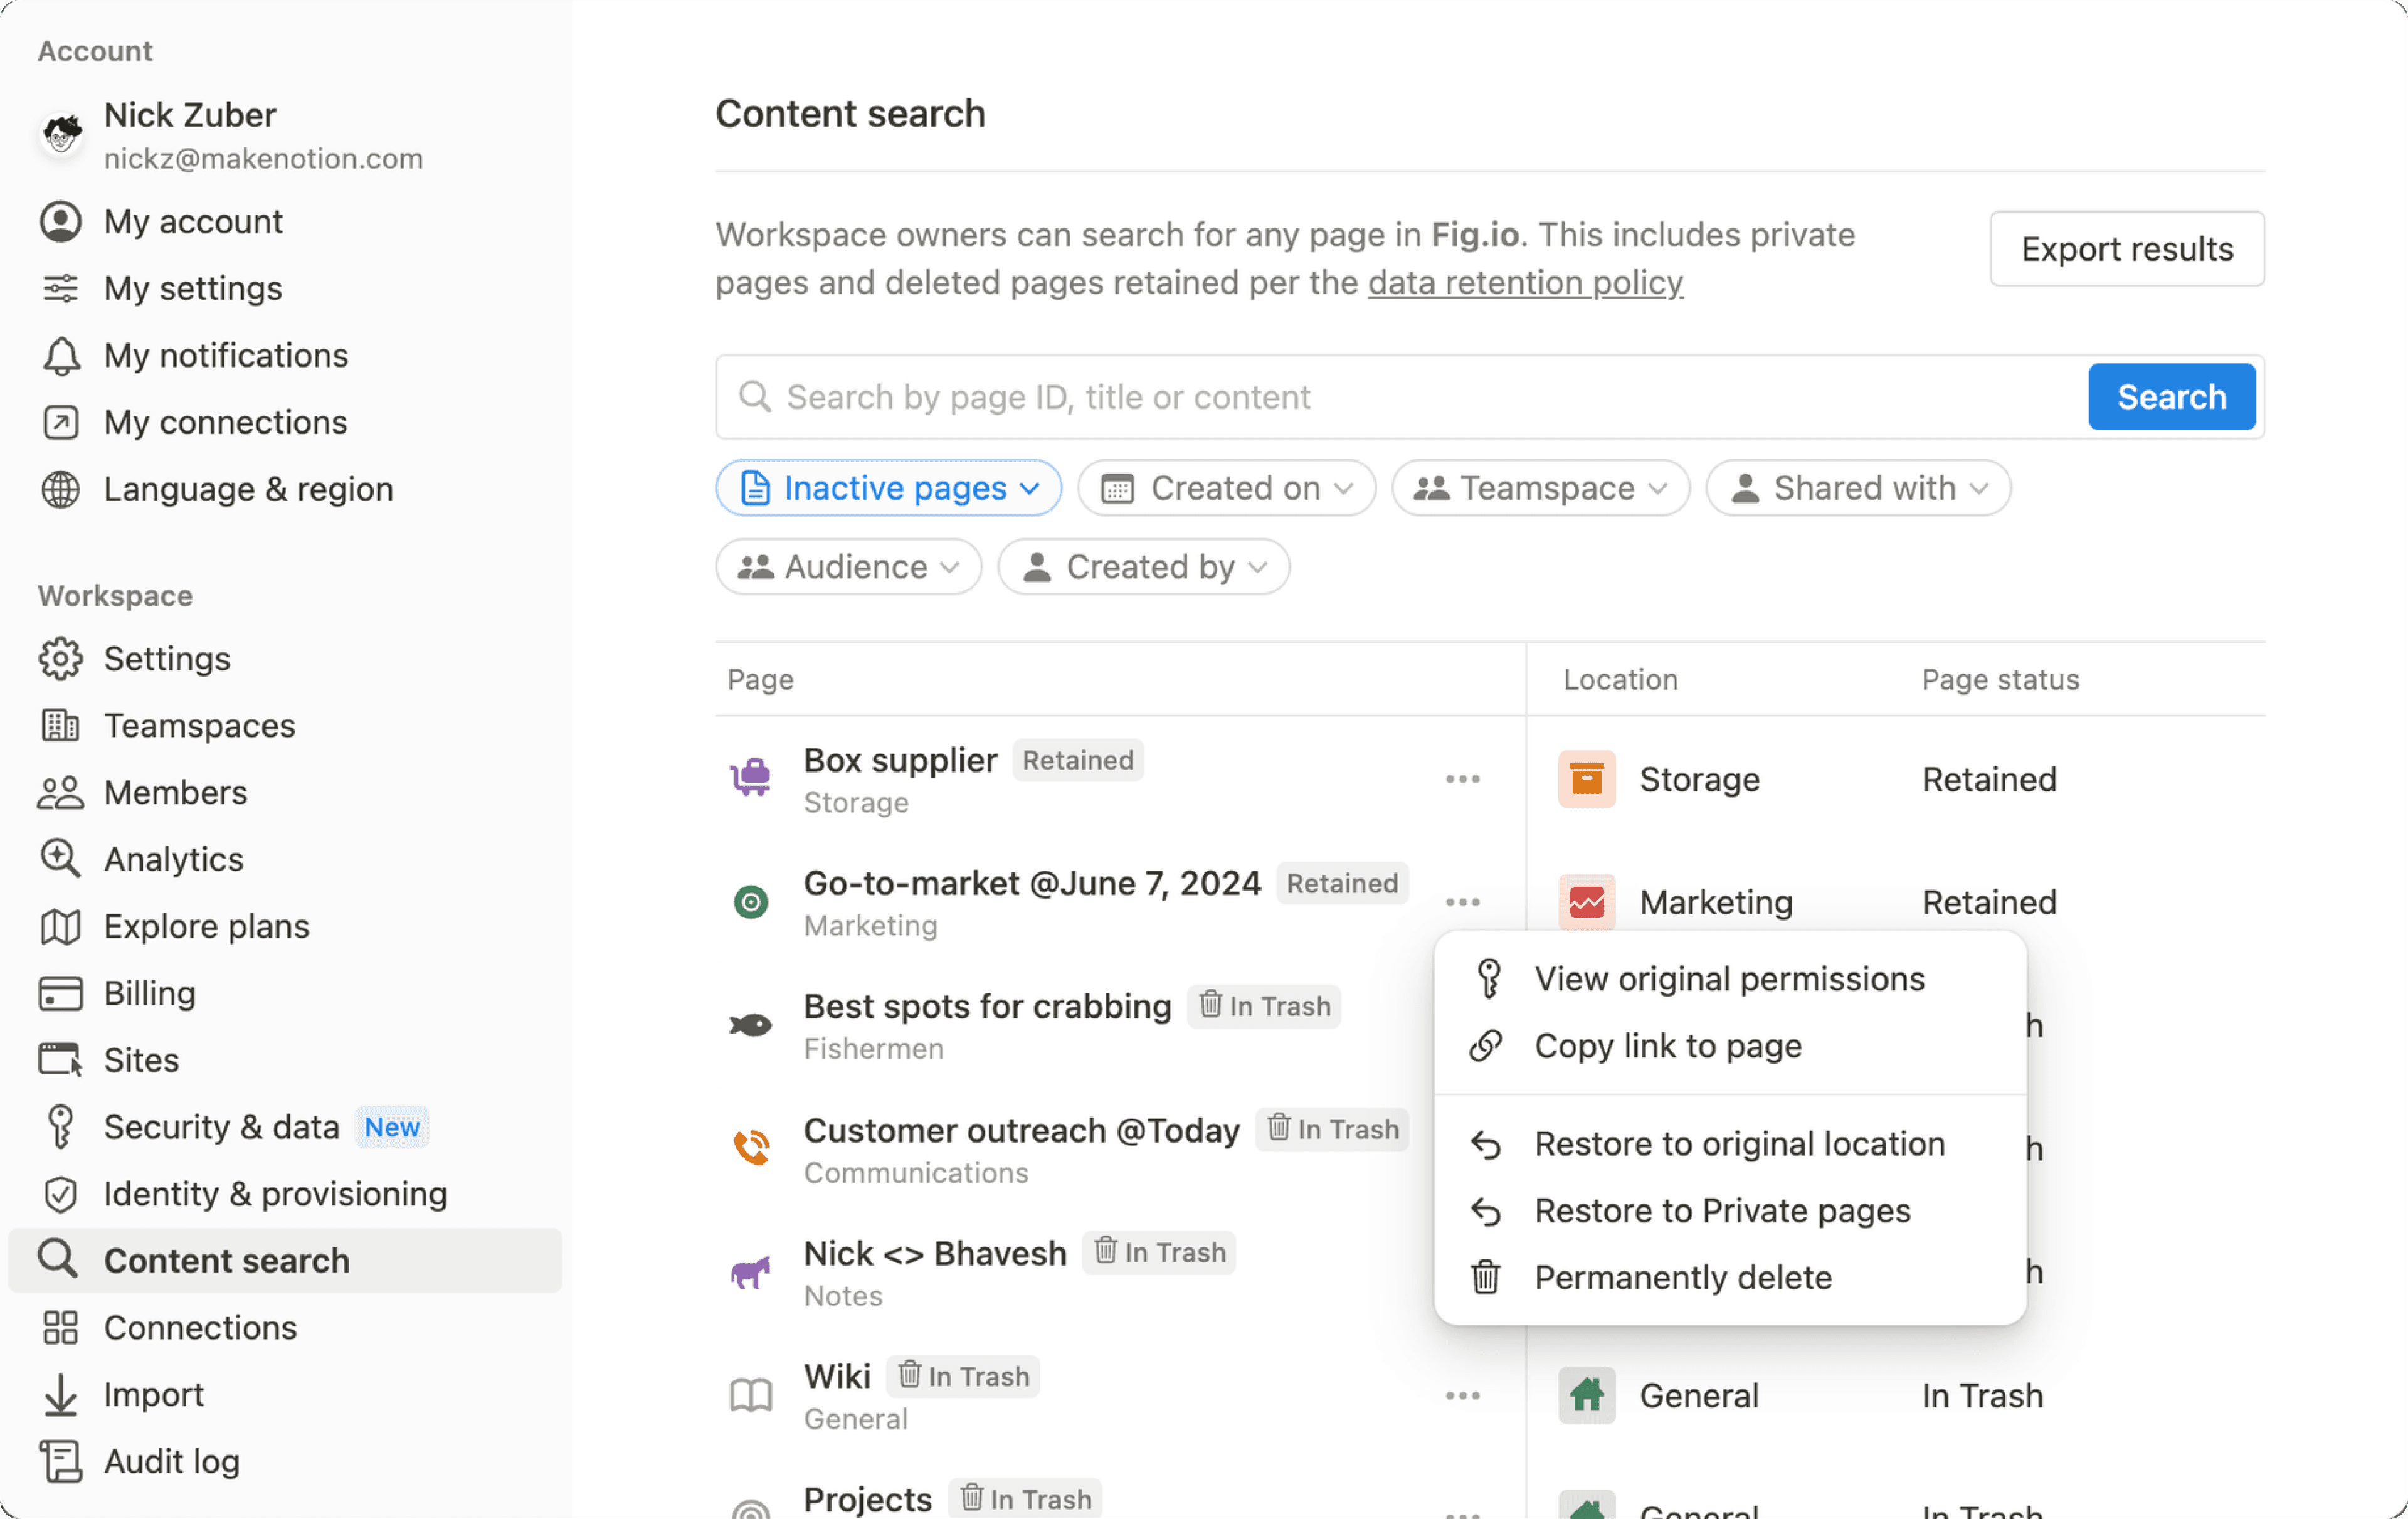
Enterprise workspace owners can utilize content search to find both pages in Trash as well as pages that have been retained, or in other words have been deleted from Trash but are still retained in accordance with their workspace’s retention settings. To use content search to find deleted and retained pages:
Select
Settingsin the sidebar →Content search.Use the
Page statusfilter and selectIn TrashorRetained pages. Add any additional filters you’d like; you can learn more about these here →

Enterprise workspace owners can restore deleted and retained pages to their original location. To do this:
Select
Settingsin the sidebar →Content search.Select
•••next to a page that’s in Trash or retained. Before you restore the page, you can selectView original permissionsto see who will regain access if you choose to put the page back where it used to be. Then, selectRestore to original locationorRestore to Private pages.
If you’d like to permanently remove a deleted or retained page from your workspace:
Select
Settingsin the sidebar →Content search.Select
•••next to a page that’s in Trash or retained →Permanently delete.
