A simple CRM for strengthening client relationships and managing work
Learn how to build a custom CRM that matches how you work and includes everything you need—from client details and portals to project management and revenue tracking.
You need a simple, flexible CRM, so instead of spending time updating spreadsheets, you can focus on delivering successful campaigns and projects for your clients.
Traditional CRMs often overcomplicate your workflow with unnecessary features and rigid processes.
But, in Notion, you can build a custom CRM that matches how you work and includes everything you need—from client details and portals to project management and revenue tracking.
Notion databases provide a structured home for growing sets of data, like your client list.
For every new prospect or client, you’ll create a new entry and use database properties to assign information and categorize items in helpful ways.
To get started:
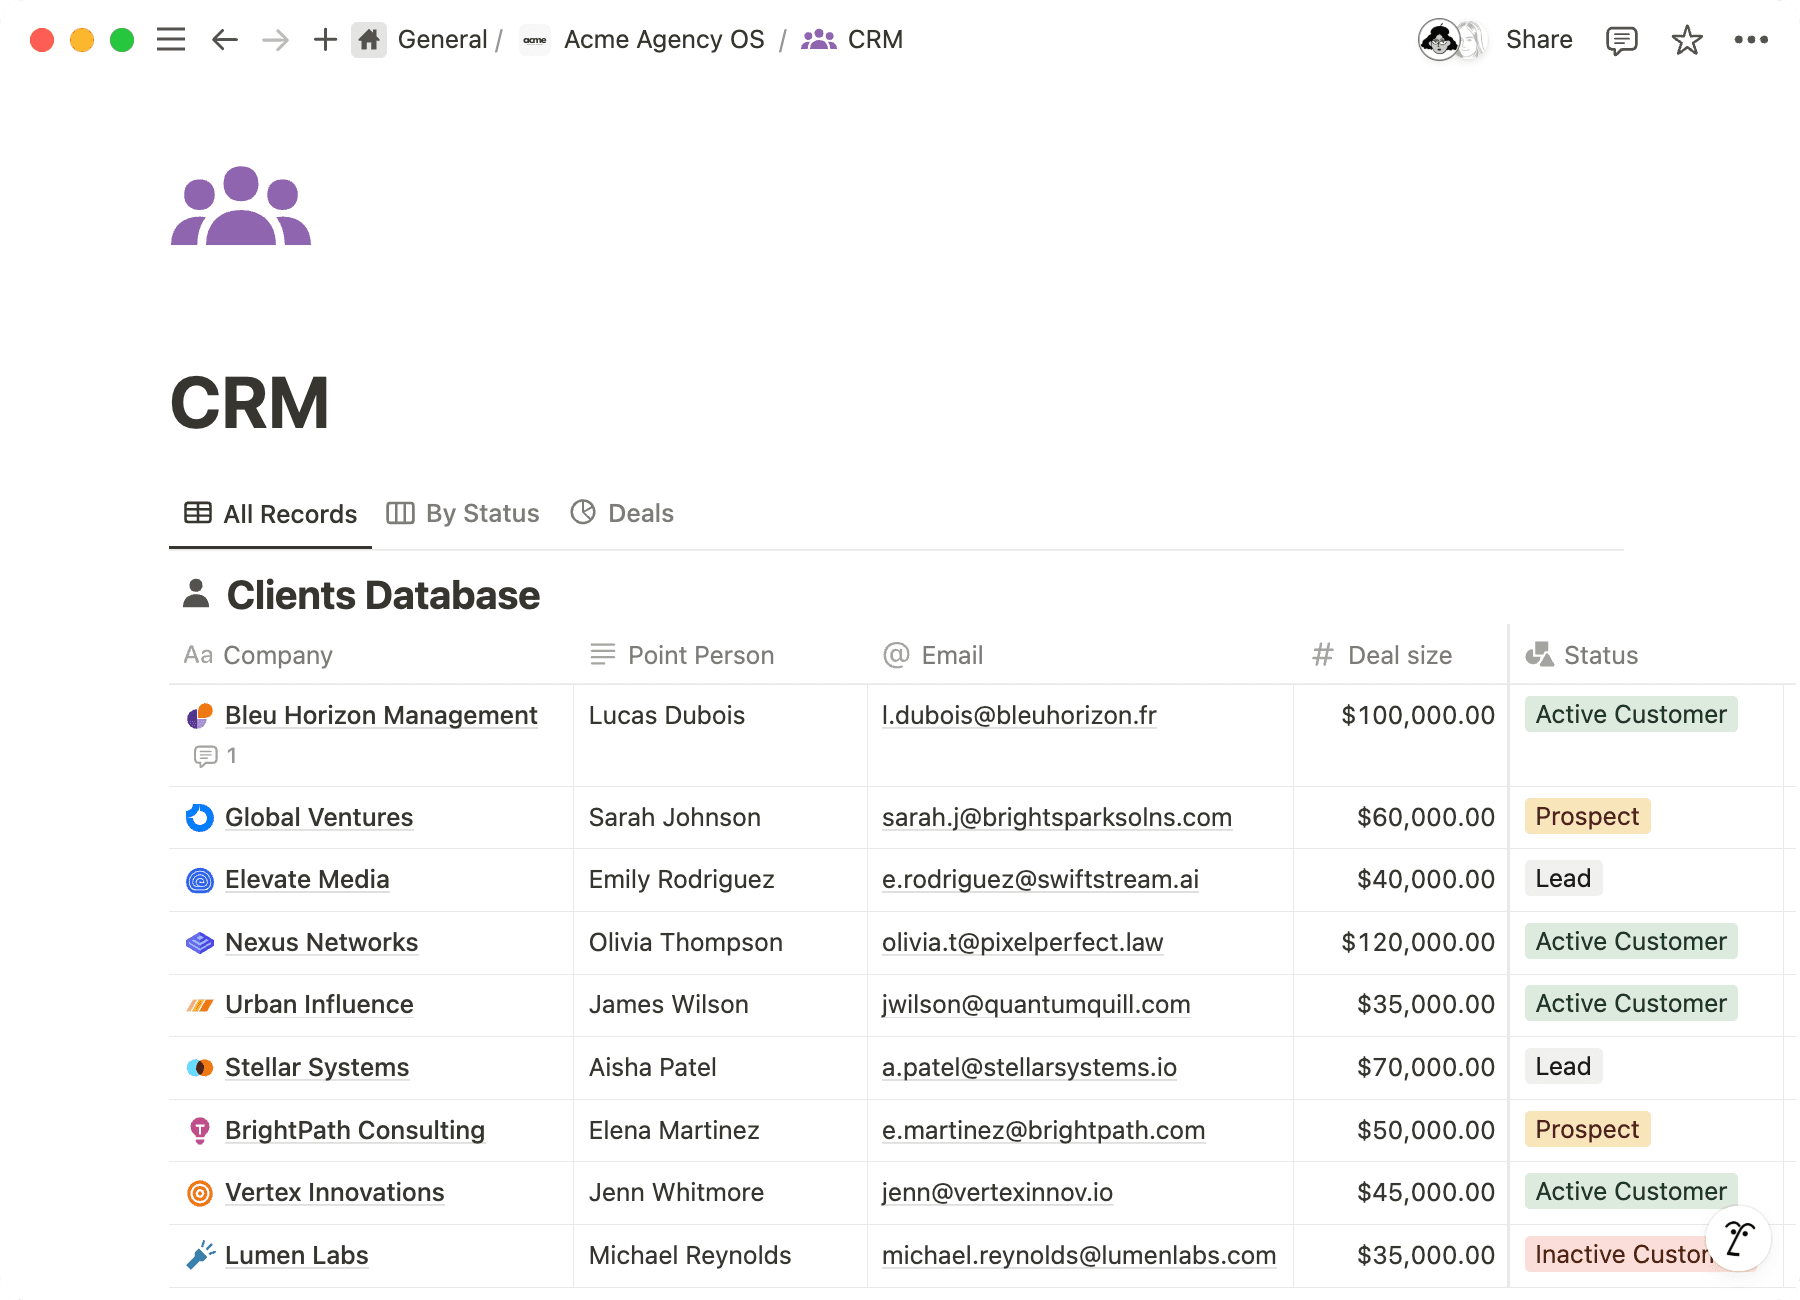
1. Create a scannable table for client details
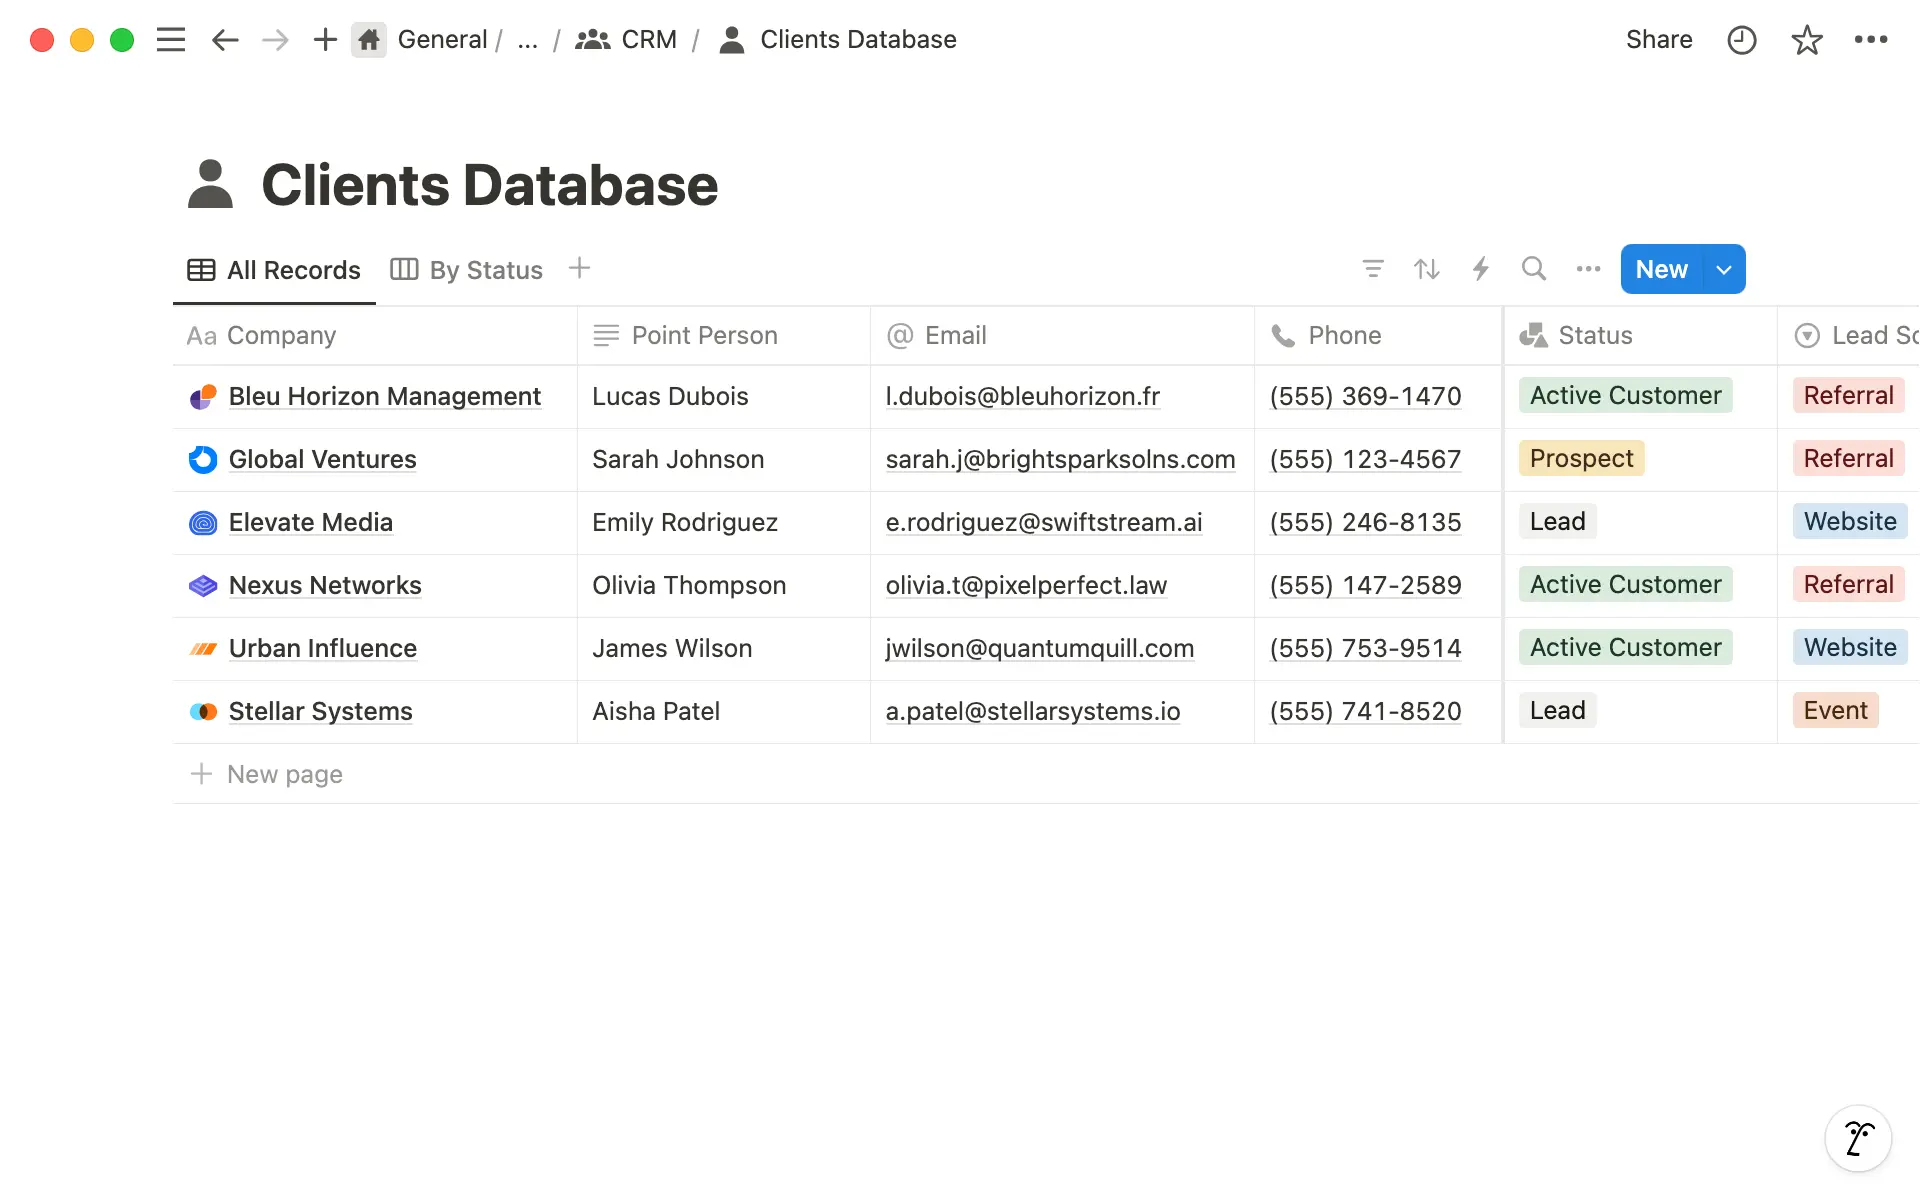
On a new page in your workspace, create a full-page database with a Table layout. This will display all your client information at a glance, in a scannable format that’s quick to update.
Next, add some properties to categorize client information across the board. For example, use a Person property to assign an account manager or owner from your team, a Text property to note your client point of contact, and Email and Phone properties to store contact information.
You can also classify entries in your database with useful custom tags. Using Select or Multi-select properties, categorize your clients by industry, company size, and lead source.
2. Manage client journey through the pipeline
Your client database is more than just a repository of information, you can use it to track leads and prospects as they move through your pipeline to become active clients.
To do this, add a Status property to your database and customize the labels to reflect each step of your funnel (Lead, Prospect, Active, etc).
Then, you can move clients across a Kanban-style board to update their status. Create an additional Board view of your database, and Group the board by Status. Now you can drag and drop clients to move them from Prospect to Lead, or Active to Inactive.
3. Reshuffle information in different, helpful ways
Sort, Filter, and Group are powerful tools to slice client information in useful ways.
For example, you might want to:
View all currently active clients— Add a new database view and apply a filter so that only clients marked as active will show up in the table.
Organize clients by industry or size — To understand more about your core client base, use Group to arrange your client database by industry, size, or any other category.
Sort your clients by lead source— Sorting your database according to lead source could help you analyze where most of your high-quality leads are coming from, which in turn will inform your marketing efforts.
Display revenue on a
Chart— Use aNumberproperty to record each client's revenue or potential deal size. Then, you can create aChartdatabase view to visualize your monthly, quarterly, or annual revenue, split by client.
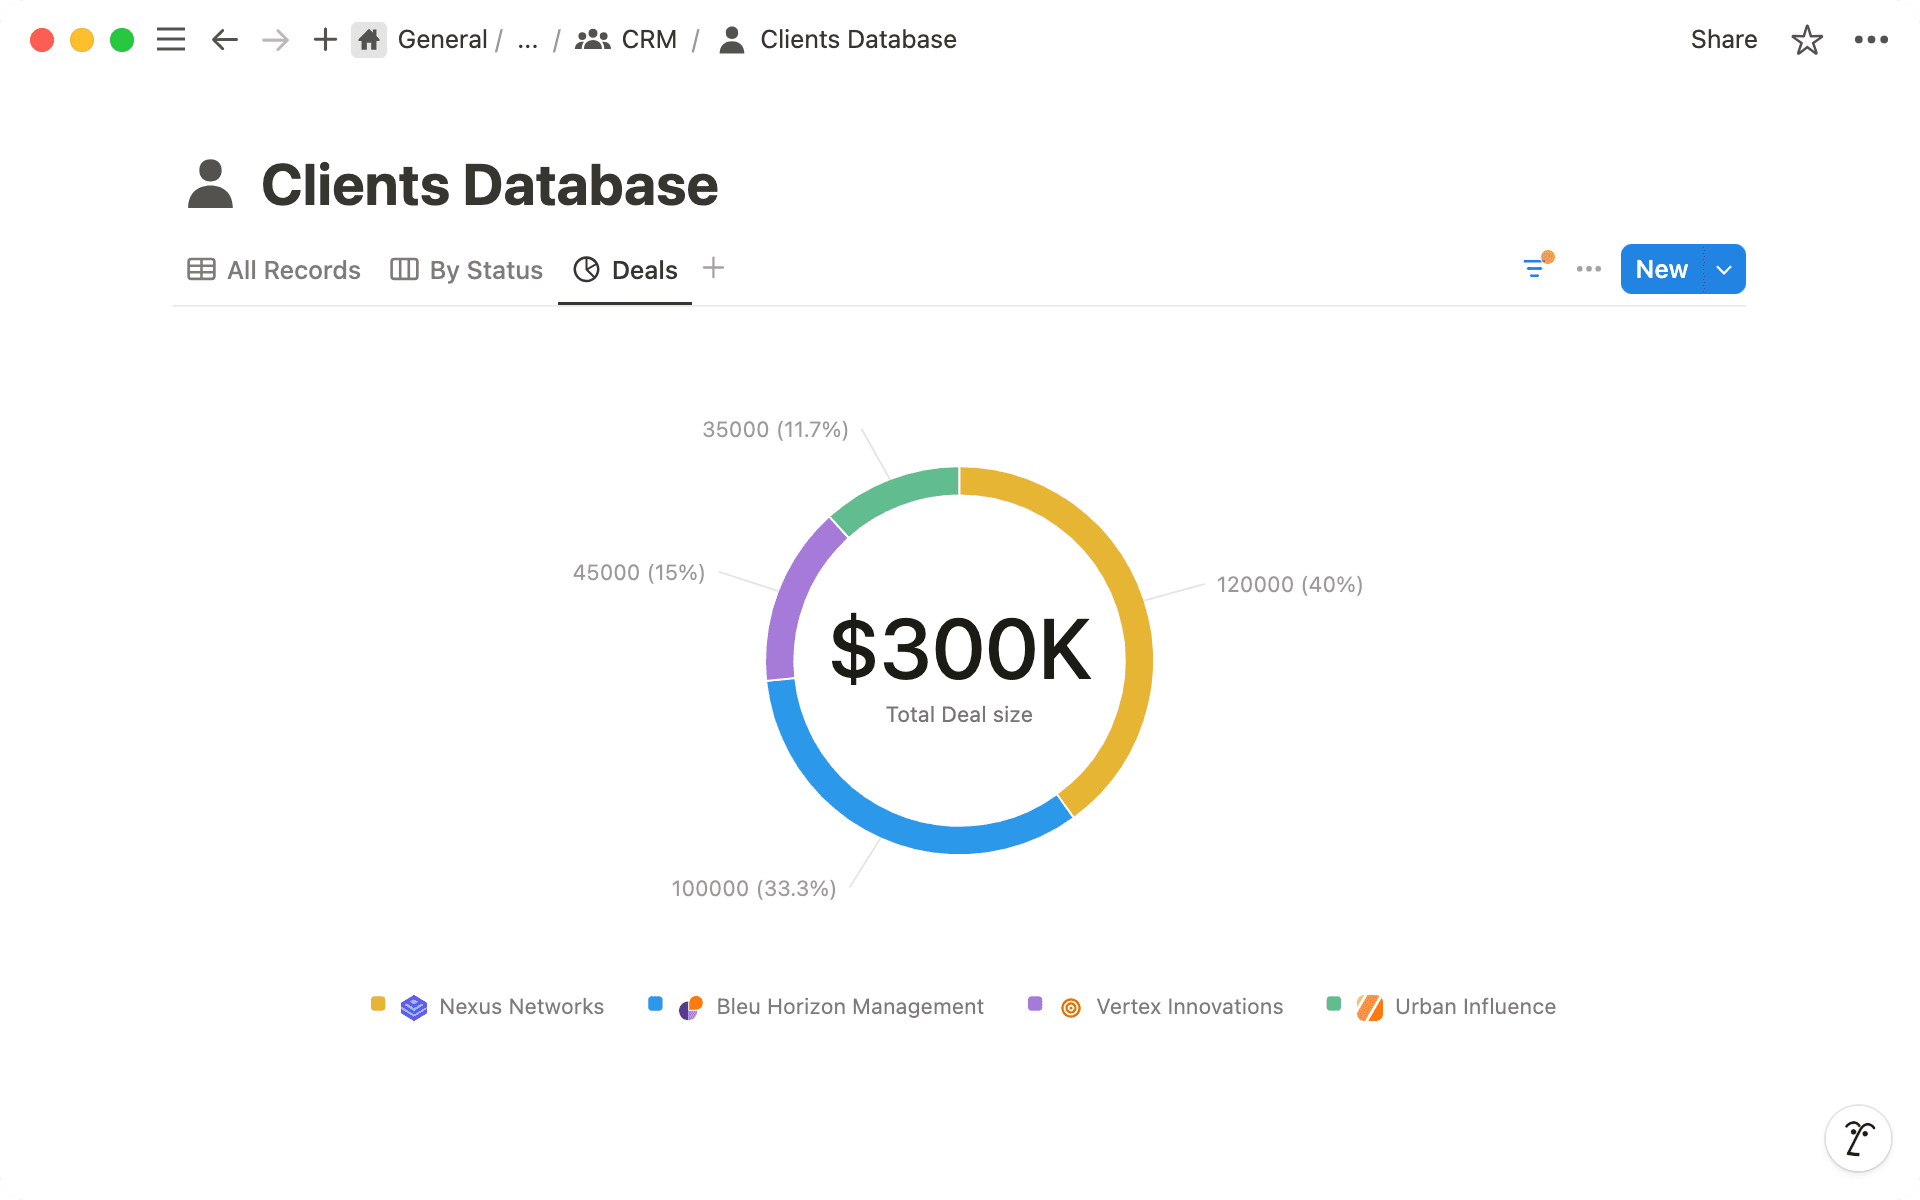
Unlike a spreadsheet or document, Notion databases let you categorize and group information however you like, so you can quickly glean insights about your client base.
Notion client portals are a central hub for contracts, agreements, reference materials, task trackers, and more, helping your team and clients stay aligned.
Clients get visibility into ongoing projects and can give instant feedback, and team members can collaborate, share information, and make progress without blockers.
Every database entry opens up as its own, fully customizable page. So, to streamline your workflow, build client portals directly in the pages of your client database.
Create homepages in the client database
Whenever you add a new client to your database, open up the database entry and start building a workspace to share with your clients.
When your portal is ready, go to the Share menu, type in your client email addresses, select a permission level from the drop-down, and click Invite.
Use client portals to:
Familiarize clients with your company— A brief introduction to explain your company mission and values helps new clients understand how you’ll work together. You might also include contact details, and procedures for booking meetings or requesting changes and updates. You can use
synced blocks to keep this information accurate and up to date.
Kick off the onboarding process— Include all the materials you want clients to go through in the onboarding phase. Here, you might have forms for clients to fill out, and requirements for getting started.
Keep contracts, agreements, and documents organized— Instead of having documents scattered across folders, keep your invoices, contracts, and agreements together in the client portal. You can create documents as sub-pages, or embed PDFs or Google docs directly into Notion.
Help team members stay on track with work— Put a project or task tracker inside the client portal to make sure team members know what to do, and clients can see what you’re working on. You could use an
Inlinedatabase to track work, or just a simpleTo-do listwhere you tag team members using the@command.Document strategy and goals— Strategize and record goals and KPIs in your client portal, to keep everyone on the same page and working towards a common objective.
Store relevant meeting notes— Take note of all client conversations with a database in the portal. Create a new entry every time you have a call or meeting to record what was said, next steps, and action items to address.
Database templates can help standardize your work and onboard clients faster. You can create a client portal template that you’ll fill up for each new client, so you don’t have to start from a blank page every time.
To do this, add a New Client template to the database, and populate the page with an outline of what you want your client portal to include. For example, insert your company bio and contact information, a checklist or database for tasks, a place to store notes and headings for things like resources, proposals, guidelines, and goals.
Now, whenever you add a new client to your database, use the template. You’ll have an outline of your client portal ready to go, and all you have to do is complete the information and attach relevant files.
2. Invite clients to the portal as guests
Once you’ve created the portal, you need to invite your clients as guests to your workspace so they can access the content.
When you invite external collaborators to your workspace, you have full control over what pages they can access, so you can make sure they see everything they need, and nothing more.
When you’re ready to share the portal, go to the Share menu at the top of the page and type in their email addresses. You might give clients full access to the page, but, in most cases, you’ll want to give them permission to view and comment, but not edit.
Clients will have access to the client portal page, as well as any sub-pages nested in it.
Learn more about sharing and permissions settings here.
3. Collaborate effortlessly
Instead of trying to keep up with conversations on several different channels, streamline communication by communicating with clients directly in your client portal.
Clients can give feedback and make requests directly in the place where you’re doing the work, creating faster feedback loops and less chance of you missing an important message.
Comments can be left at the top of any Notion page, or on a specific block within the page. You can tag team members or guests in a comment using the @ command and typing their names.
Clients can request changes to a document, and you can assign tasks to a team member or ask a manager to review work with a comment.
With all communication in Notion, your team and clients can work faster with full visibility and reduce the friction of collaborating with clients.
What starts as a basic CRM can be customized as your team grows and processes evolve. You can incorporate different aspects of you work. company knowledge and project management.
Connect clients to projects, meetings, and company knowledge for a comprehensive, connected system that keeps all your work in one place.
Draft docs faster with AI— You can outline and draft proposals, creative briefs, and campaign plans much faster using Notion AI to write, edit, and refine your content.
Surface insights from across the workspace— With Notion’s AI assistant, you can ask natural language questions about any content in your workspace and get an immediate answer.
Reduce manual work with automations— Database automations reduce the manual work of updating your CRM. For example, you can use database automations to notify team members by Slack or email when a client goes live.
Centralize your company information in a homepage— On a top-level workspace page, create a company homepage where team members can access all the internal resources and documentation about your company, with quick links to client pages and ongoing work.

Templates
Ficou faltando abordar algo?